Modern SharePoint:
From a UI branding perspective, Modern SharePoint is a totally different beast when compared to any of its many and varied predecessors.
Prior to the Modern SharePoint UI, with its restrictions and limitations around branding, the previous versions were like the wild-wild west! And by that I mean that a UI developer had almost limitless options to re-tool the UI in any way they saw fit. Besides the various OOB “theming” tools and techniques, it was possible to make significant customizations to the DOM structure via custom (or customized) Master Page and Page Layouts, as well having multiple ways to inject broadly scoped custom CSS and incorporate custom JavaScript.
The upside to this was that a SharePoint UI could be extensively re-branded, allowing it to fit seamlessly alongside any other branded assets or collateral, but the downsides were many. For example, any alterations to the DOM structure could easily cause the customizations to unravel. This is not a problem if your installation was on-premises, but this would be a significant problem with SharePoint Online where it is Microsoft’s prerogative to make such changes in the interest of “evergreen” platform updates as new features are rolled out.
Though the Modern SharePoint UI may lack those “carte blanche” branding options; its clean, “form-follows-function” visual design, and great mobile display capabilities, arguably outweigh them.
Having said that, it’s worth noting that the Modern SharePoint platform does have many built-in tools and settings that offer reasonable branding options, and with a little know-how, some nice extensions and customizations can be applied.
In this article, I’m going to go over some of the options using the “Change the Look” tools, which is the name of the theming options/tools in SharePoint. Then I will show how to create a custom theme and apply a custom Site Logo.
Change the Look (what comes “out-of-the-box”):
Applying a new OOB theme
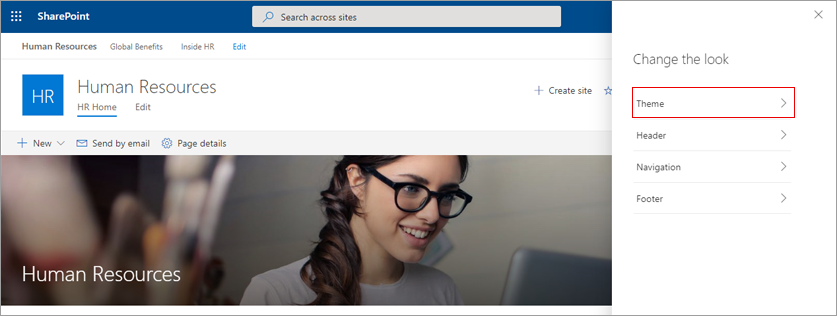
Click the Gear icon (aka “Settings”) and then click “Change the Look”

You will see the “Change the Look” menu containing several sections, choose the “Theme” section
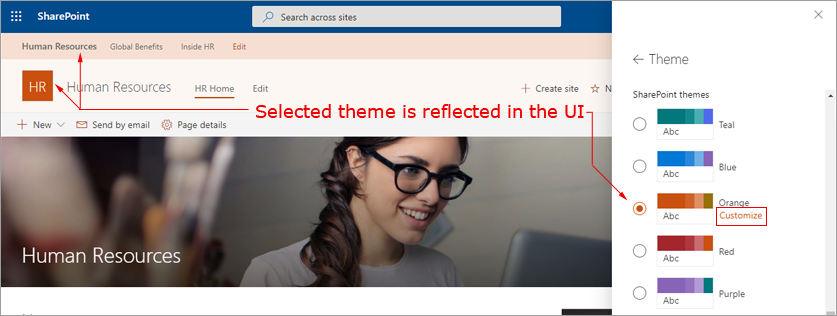
At the top of the tile, the “Site Theme” section at the top shows the color swatch of the “Current Theme” (It does not display the name of the theme)
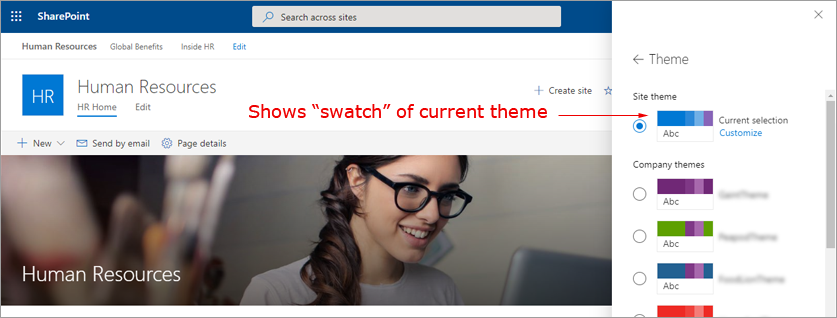
Clicking the large radio button next to one of the themes will display a preview of the selected theme being applied to the actual UI; and if the theme is one of the 9 default SharePoint themes, you will see a “Customize” link appear as well.
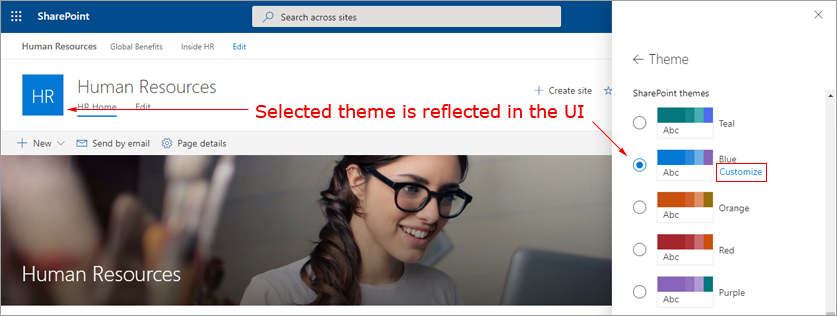
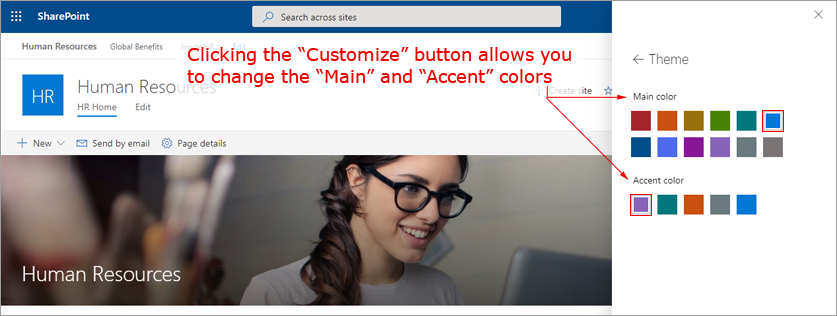
Clicking the “Customize” link opens a color swatch picker panel allowing you to change the “Main Color” and the “Accent Color”. If you change one or both of these colors, you will see a preview of the selected, customized theme being applied to the actual UI
To apply the theme, click the [Save] button.
Note: if an OOB theme is “customized” in this manner, it will be applied to the current Site Collection, but the customization will not be permanently saved. This means that if another theme is applied, (including the one currently applied as “customized”), the customizations will be deleted and replaced by the chosen theme (creating a permanent custom theme will be covered later in this article).
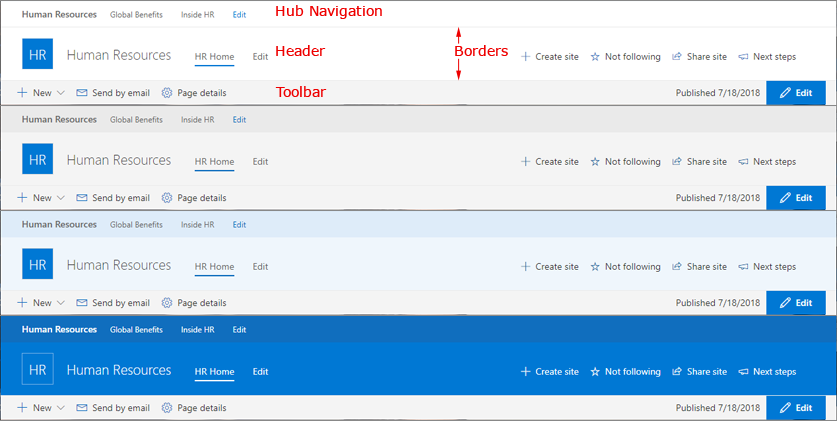
Header Layout and Background:
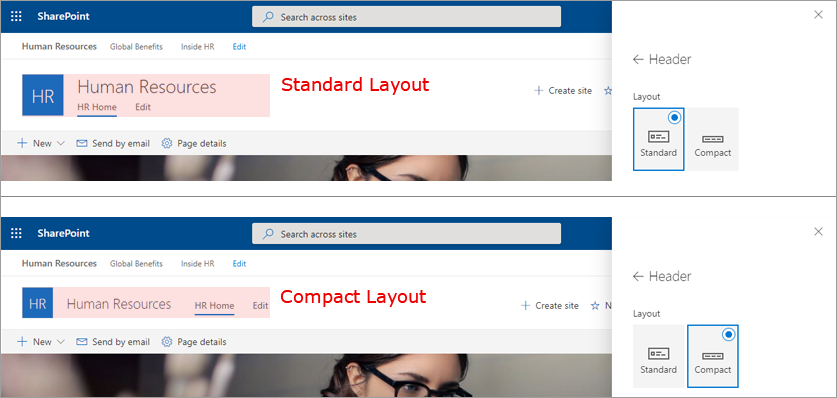
The “Header” section also contains options for a “Compact” version of the Header/Navigation which reduces the font size and sets the Navigation to display aligned horizontally with the Site Title and Logo.
The “Background” settings apply various background colors from the current theme to the Main Header, Tool Bar, and Hub-Site Navigation (if applicable), and the borders in between them.
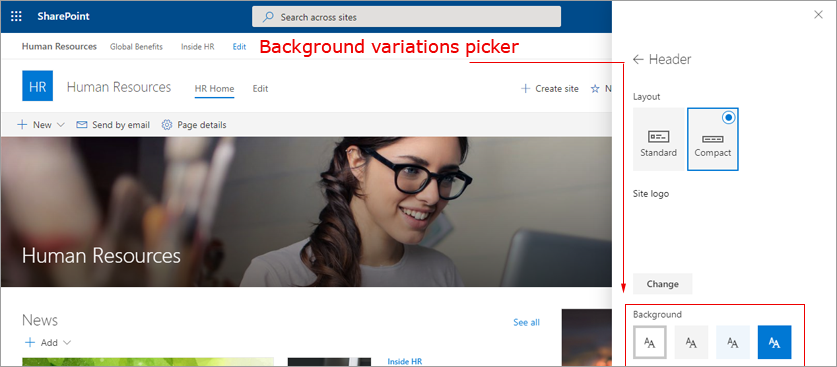
The 4 options apply the following color slot values to the following regions of the header
- Option #1 (Lightest)
- Hub Navigation Background:
white - Border:
neutralLight - Header Background:
white - Border:
neutralLight - Toolbar Background:
neutralLighter
- Hub Navigation Background:
- Option #2 (Light-Medium)
- Hub Navigation Background:
neutralLight - Border:
neutralLight - Header Background:
neutralLighter - Border:
neutralLight - Toolbar Background:
neutralLighter
- Hub Navigation Background:
- Option #3 (Theme Light)
- Hub Navigation Background:
themeLighter - Border:
themeLighter - Header Background:
themeLighterAlt - Border:
neutralLight - Toolbar Background:
neutralLighter
- Hub Navigation Background:
- Option #4 (Theme Dark)
- Hub Navigation Background:
themeDarkAlt - Border:
themeDarkAlt - Header Background:
themePrimary - Border:
neutralLight - Toolbar Background:
neutralLight
- Hub Navigation Background:
An example of the four color-ways can be seen below. NOTE: the top example showing the four regions described above:
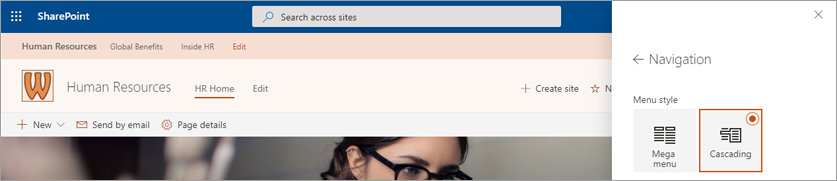
Navigation Options “Mega Menu” vs “Cascading”:
The Change the Look / Navigation section offers two different options for the display of the Main Navigation. To switch between these two options, go back to the “Change the Look” menu and click to open the “Navigation” section.
The differences between these two options is only evident when there are sub-links in the navigation. The “Cascading” view shows a fly-out drop-down box containing the sub-links, while the “Mega Menu” shows the sub-links in a rather large grid.
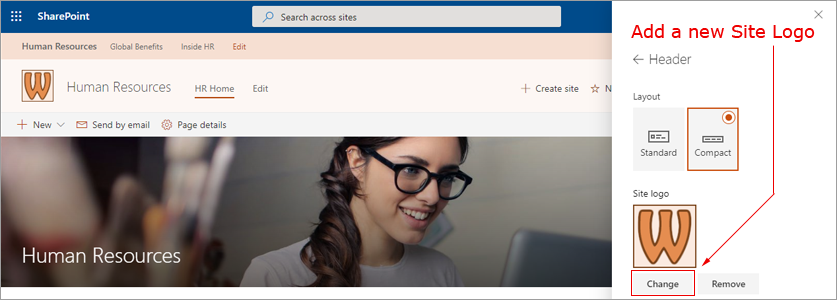
Adding a custom Site Icon:
Within the Banner/Navigation section of the page there is a Site Logo, which by defaults appears as a square box with the first letter of the Site Collection and displaying a background color of the main theme color.
To add a custom Site Logo image:
Go back to the “Change the Look” menu and click to open the “Header” section.
Under the “Site Logo” area choose the [Change] button, then navigate to an image (preferably a square image) and then click the [Save] button.
It’s a good idea to choose a Site Logo image whose colors match the desired theme and works well within the design of the Header. Note in this example that the image reflects the “Orange” theme
Creating a Custom Theme
In this section we will be creating a custom theme and applying it using SharePoint Online Management Shell, which is a Windows PowerShell module command-line interface.
Install SharePoint Online Management Shell:
Using the online Theme Generator tool:
- https://developer.microsoft.com/en-us/fabric#/styles/themegenerator
- https://fabricweb.z5.web.core.windows.net/pr-deploy-site/refs/heads/master/theming-designer/index.html
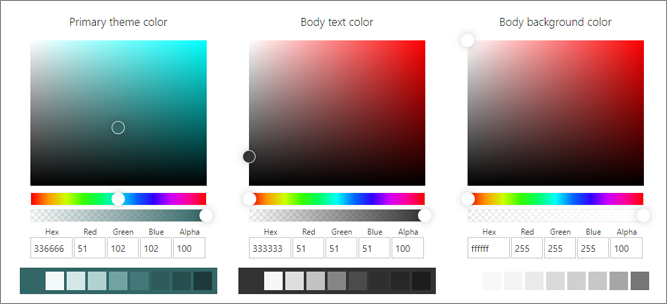
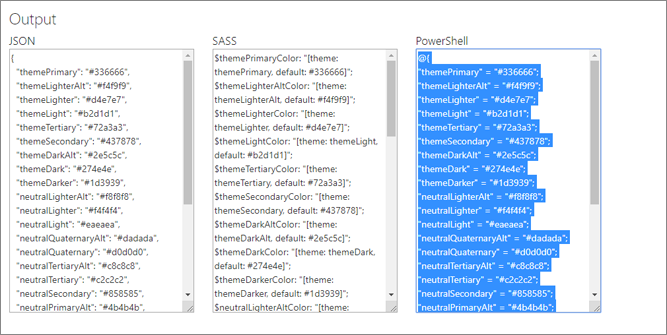
The Theme Generator is a handy tool that allows you to quickly define the colors for a new theme’s color-slots and then output it to one of the common formats, either JASON, SCSS (Sass) or a PowerShell script.
In our example, we will be using SharePoint Online Management Shell, and therefore will output as “Power Shell”.
Currently, the Theme Generator defines 28 slots, but there are newer ones that can be added manually.
Nine of the slots have slot names that are prefixed with the word “theme” and they map to the areas of the UI that display these as “themed” background colors.
A nice feature of the Theme Generator is that by defining the “Primary Theme Color” (which corresponds to the “themePrimary” color slot), it will calculate the hex number for the other 8 “theme” color slots using different values of the same color.
This ensures that the theme’s colors all work well together from a visual design perspective. However, you are not forced to use the calculated colors. Once the theme code has been copied/pasted into a text editor, the color’s hex values can be changed.
It’s a good practice to iteratively create the new theme, apply it to see the result, and then delete the theme, edit the code and then re-create the theme and re-apply etc.
Using this approach with the custom theme in conjunction with the other tools in the “Change the Look” tool set (as described previously) will produce the optimal look and feel.
Once the editable colors have been added to the Theme Generator, copy/paste the code (PowerShell in our case) into a code editor.

SharePoint Online Management Shell:
This command-line interface is very powerful and is used for many operations within SharePoint, including many that cannot be performed through any other interface.
We will only be using a few commands (AKA “cmdlet” in PowerShell parlance) that deal with themes, but a full set of cmdlets can be found at:
Add the custom theme:
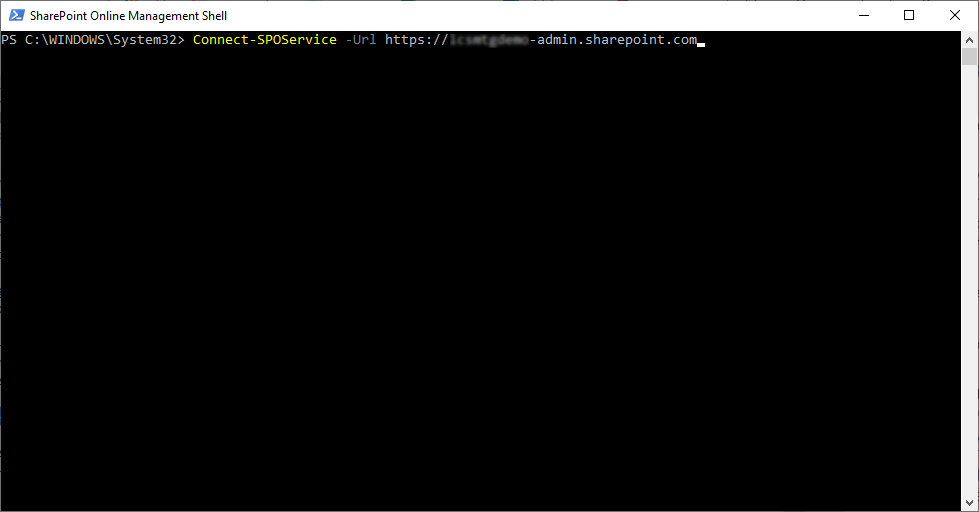
Open SharePoint Online Management Shell and log into you tenant as an Admin:
Connect-SPOService -url https://[your tenant]-admin.sharepoint.com
- NOTE: be sure to replace
[your tenant]with your actual tenant’s name - NOTE: Be sure to add the suffix “
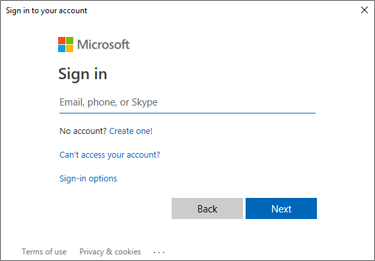
-admin” to the tenant’s name - NOTE: You will be prompted to login using an admin username and password
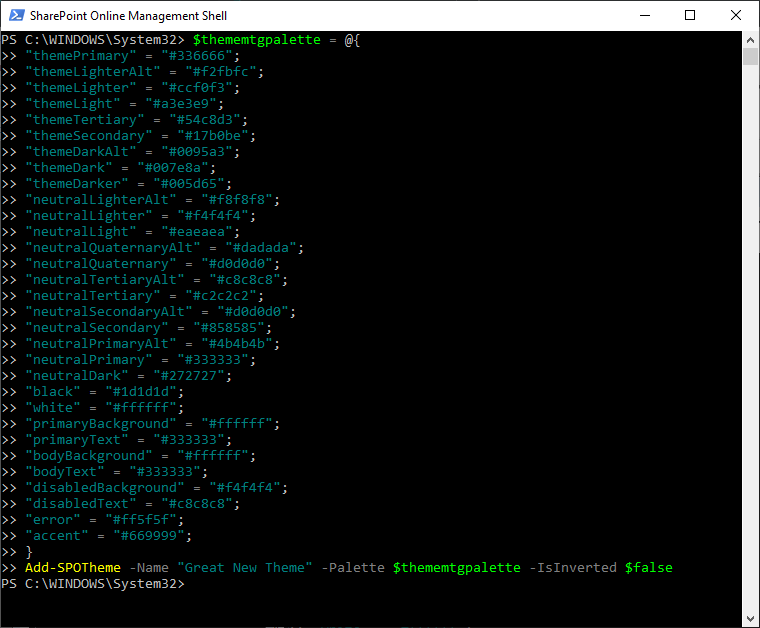
Enter the code for the theme (my example contains a few additional slots that aren’t included in the output of the Theme Generator but can be added manually).
- NOTE we are using the “
Add-SPOTheme” cmdlet to add the custom theme. It takes the palette object as a variable called “$thememtgpalette”.
Use the code below as an example, where the variable is defined fist, and then called within “Add-SPOTheme” cmdlet within the “-Palette” parameter (shown in Blue
- NOTE: the slots listed in Red represent the “theme” specific colors where “
themePrimary” is defined as the “Theme Primary Color” in the Theme Generator, and the other 8 “theme” slots are calculated from the “Theme Primary Color” (but can be altered manually)
The slots listed in Green represent the ones missing from the Theme Generator tool, but were added manually
	$thememtgpalette = @{
	"themePrimary" = "#336666";
	"themeLighterAlt" = "#f2fbfc";
	"themeLighter" = "#ccf0f3";
	"themeLight" = "#a3e3e9";
	"themeTertiary" = "#54c8d3";
	"themeSecondary" = "#17b0be";
	"themeDarkAlt" = "#0095a3";
	"themeDark" = "#007e8a";
	"themeDarker" = "#005d65";
	"neutralLighterAlt" = "#f8f8f8";
	"neutralLighter" = "#f4f4f4";
	"neutralLight" = "#eaeaea";
	"neutralQuaternaryAlt" = "#dadada";
	"neutralQuaternary" = "#d0d0d0";
	"neutralTertiaryAlt" = "#c8c8c8";
	"neutralTertiary" = "#c2c2c2";
	"neutralSecondaryAlt" = "#d0d0d0";
	"neutralSecondary" = "#858585";
	"neutralPrimaryAlt" = "#4b4b4b";
	"neutralPrimary" = "#333333";
	"neutralDark" = "#272727";
	"black" = "#1d1d1d";
	"white" = "#ffffff";
	"primaryBackground" = "#ffffff";
	"primaryText" = "#333333";
	"bodyBackground" = "#ffffff";
	"bodyText" = "#333333";
	"disabledBackground" = "#f4f4f4";
	"disabledText" = "#c8c8c8";
	"error" = "#ff5f5f";
	"accent" = "#669999";
	}
	Add-SPOTheme -Name "Great New Theme" -Palette $thememtgpalette -IsInverted $false
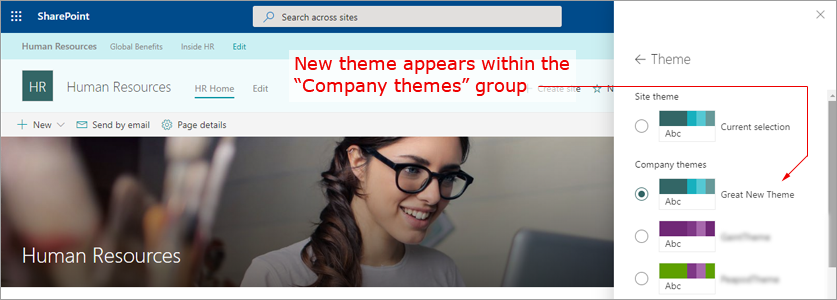
Apply the custom theme:
Once the new theme has been added, it can be applied via “Settings” => “Change the Look” => “Theme” The custom theme is added to the “Company Themes” section of the Themes panel.
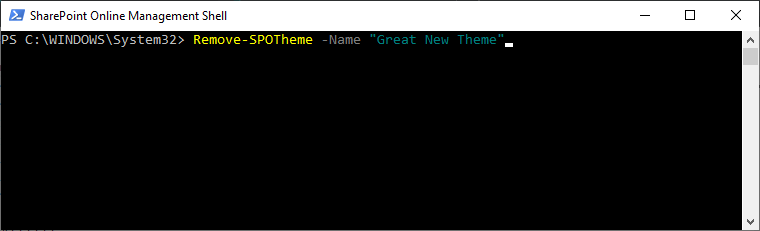
Modify an added theme / remove an added theme:
In order to modify the theme after it’s been added, it must be removed first using the cmdlet “Remove-SPOTheme”, and then re-added using the cmdlet “Add-SPOTheme” (as described above)
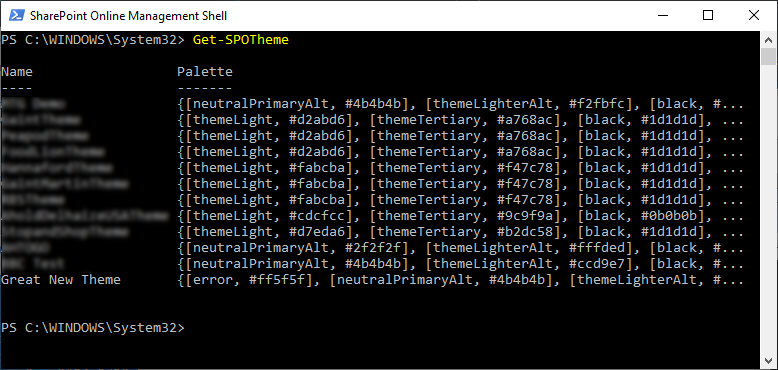
Show all custom themes:
In order to see all custom themes added to this tenant, use the cmdlet “Get-SPOTheme”
Hide / Show default themes:
In order to enforce branding standards, you may choose to hide all of the OOB themes from the end user and thus require them to use only the custom themes.
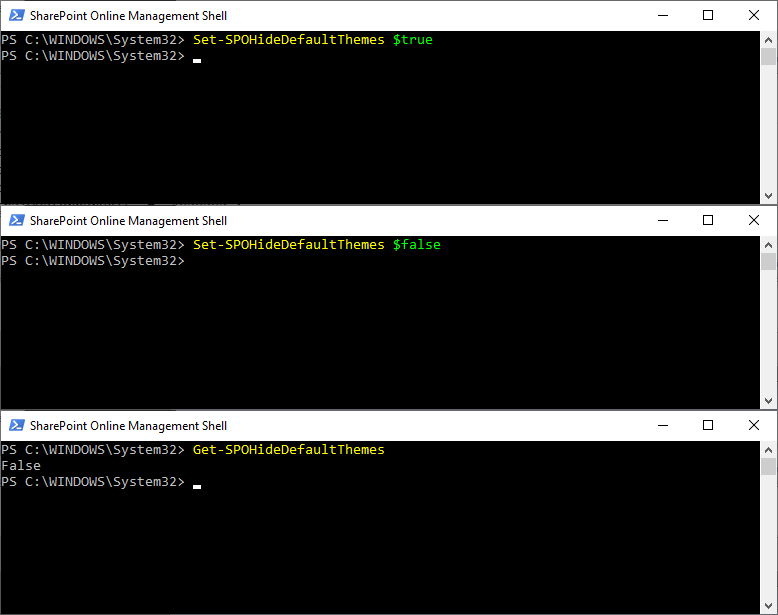
This is achieved using the “Set-SPOHideDefaultThemes” cmdlet, which has two parameters, one to “hide” and the other to “show”:
Set-SPOHideDefaultThemes $true: (hides the default themes)Set-SPOHideDefaultThemes $false: (shows the default themes)Get-SPOHideDefaultThemes: (shows the current setting ofSet-SPOHideDefaultThemes)
Exporting an existing theme:
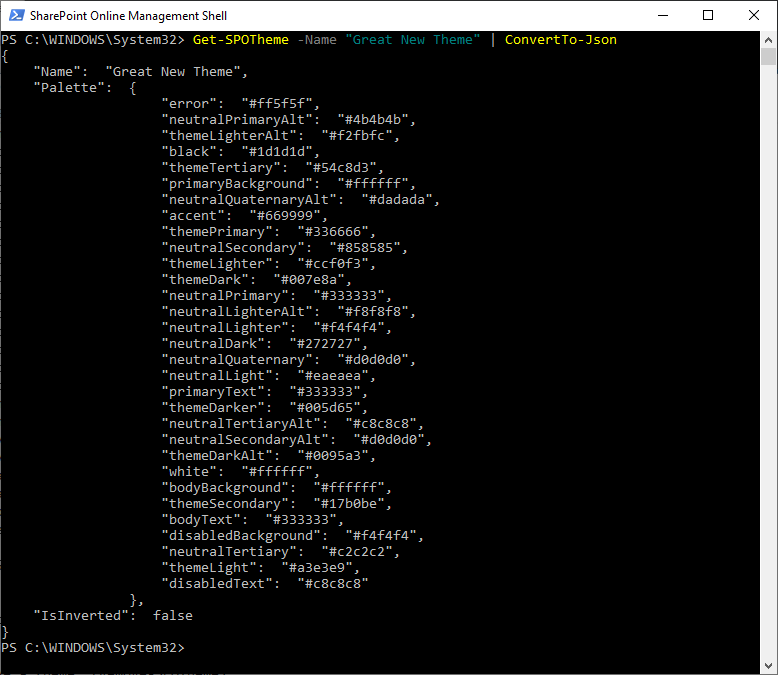
Using the “Get-SPOTheme -Name” cmdlet, you can export a custom theme in the form of a JSON object. The cmdlet takes a property of the title of the theme and a pipe to convert to JSON:
Get-SPOTheme -Name "MTG Demo" | ConvertTo-Json
In Conclusion
So that's a few basics around using themes and adding a custom Site Logo in Modern SharePoint sites.
We also looked at the steps needed to create a custom theme using the free Theme Builder tools and then applying it using a few simple SharePoint Online Management Shell cmdlets.
Stay tuned for additional posts on slightly more advanced approaches to enforcing your branding requirements with Modern SharePoint!